Burning Realistic Skin Tones in Pyrography | Burn With Confidence
 Kez Halliday
Learn how to burn realistic skin tones in pyrography. Step-by-step tips for smooth shading, freckles, wrinkles, and undertones. Phoenix Pyrography
Burning Realistic Skin Tones in Pyrography | Burn With Confidence
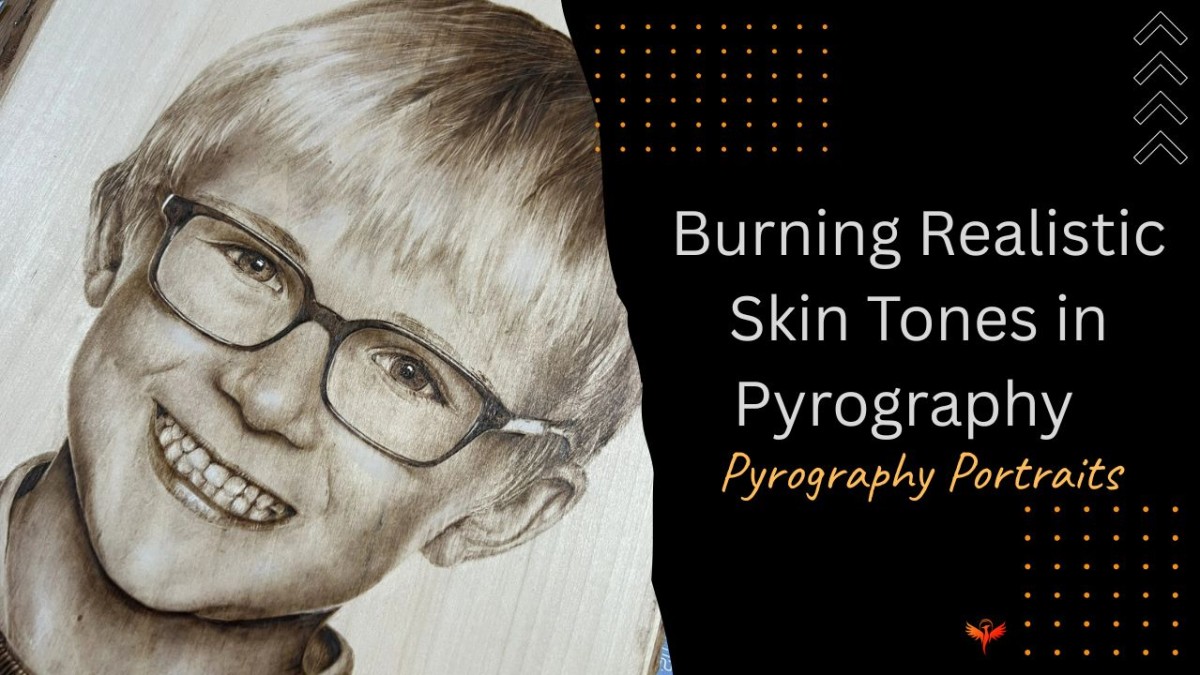
One of the trickiest parts of realistic pyrography portraits is skin. It’s a huge part of the face, and if it looks flat, the whole portrait suffers. But here’s the good news: you don’t need a hundred fancy nibs or a secret stash of magical wood. You just need a bit of patience, a good eye for values, and the willingness to take it layer by layer.
Let’s break it down so skin tones stop feeling scary and start feeling doable.
1. Values Before Detail
Forget colour palettes — in pyrography, skin is all about values and shading.
-
Highlights: Keep cheekbones, forehead, and nose tips lighter with barely-there burns.
-
Mid-tones: Use smooth, circular shading for most of the face.
-
Shadows: Under the chin, nose, and around the eyes need darker, controlled shading.
Without contrast, your pyrography portraits will look flat. Values = life.
2. Smooth vs. Textured Skin in Pyrography
Different ages need different textures:
-
Children & babies → soft and smooth, minimal marks.
-
Young adults → gentle tonal shifts.
-
Men → a touch of grain adds realism.
-
Older subjects → wrinkles, creases, and age spots are essential. Fine lines and dots with your nib give that lived-in texture.
3. Undertones in Woodburned Skin
Realistic pyrography isn’t just light and dark — undertones matter too.
-
Warm undertones → created with softer, glowing burns.
-
Cool undertones → slightly deeper tones, careful shading.
-
Freckles & spots → add last with varied dots. Scatter, don’t stamp!
4. Layer Like a Pro
Skin tones aren’t built in one pass. They’re layered.
-
Start with light shading. (base layer)
-
Add mid-tones gradually.
-
Deepen shadows slowly.
-
Blend overlaps for smooth transitions.
Think of it like brewing a strong cuppa — rush it and it’s weak, let it build slowly and you’ve got richness.
5. Quick Tips for Better Pyrography Skin Tones
Final Encouragement
Skin tones can be the scariest part of pyrography portraits — but they’re also the most rewarding. Every layer you burn adds depth, dimension, and life. Don’t rush. Take it step by step, and before long you’ll be creating realistic pyrography skin tones that make people double-take and ask, “Wait… is that actually burned into wood?!”
Here at Phoenix Pyrography Academy, my mission is to help you go from overwhelmed and unsure to confident and proud of your art. Whatever stage you’re at, remember: you can always learn, improve, and most importantly, burn with confidence. 🔥
Categories: : Realistic Portraits