How to Get Started in Pyrography: A Beginner-Friendly Guide to Woodburning Art
 Kez Halliday
Learn how to start pyrography with beginner tools, tips, and simple project ideas to make your first burn with confidence.
How to Get Started in Pyrography: A Beginner-Friendly Guide to Woodburning Art
Everything you need to know to start your first project with confidence (without feeling overwhelmed).
🔥 What Is Pyrography?
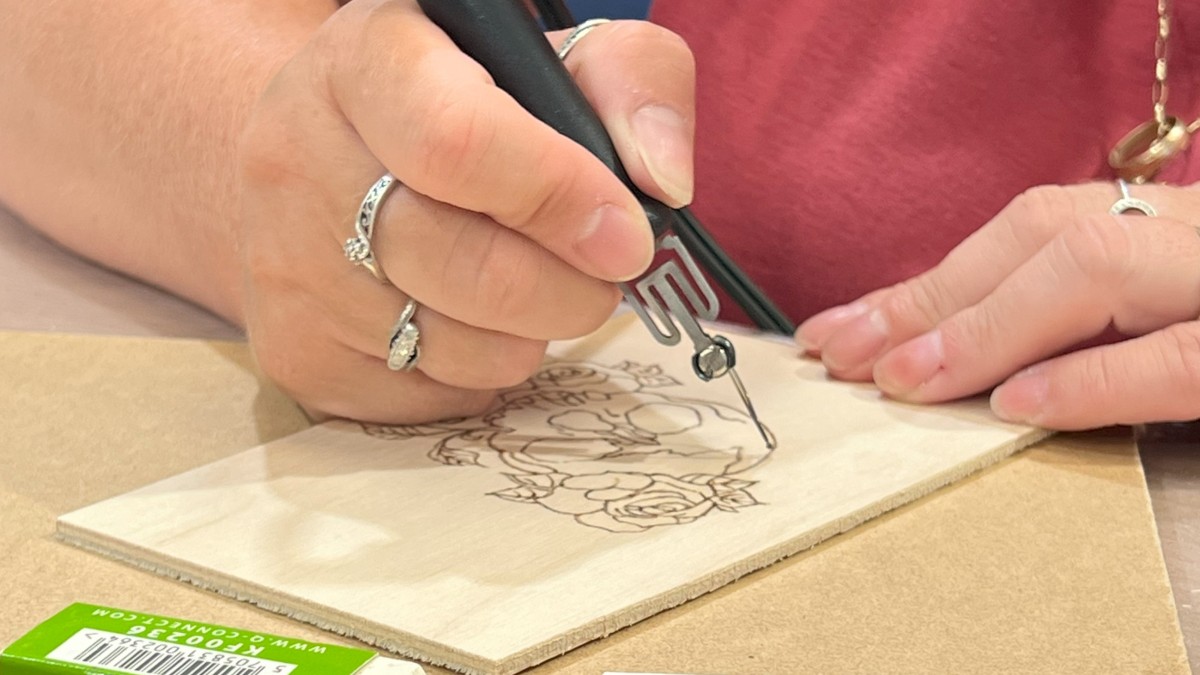
Pyrography — also known as woodburning — is the art of drawing with heat. Using a heated pen-like tool, you burn designs into wood (or sometimes leather, cork, or paper), creating rich textures and images that last.
It’s a slow art form but therapeutic. — perfect if you love working with your hands and want to create meaningful, lasting pieces.
🧰 Pyrography Starter Kit: What You Actually Need
No need to spend a fortune or get lost in tool overload. Here’s a simple beginner setup that will help you start strong without getting stuck:
✅ Basic Tools Checklist:
Woodburning Pen – A basic solid-tip pen is perfect to start, or try a variable temperature pen if you want more control.
Soft Wood – Basswood, poplar, or birch plywood are ideal for smooth burning.
Sand Paper (120, 240, & 320 grit) – Smooth wood gives you cleaner lines and helps your pen nib glide easier.
Pencil + Eraser – Sketch your design before burning.
Good Ventilation – A fan, window, or even a small extractor helps keep smoke away.
✏️ Your First Project: Keep It Simple
For your first try, keep it low-pressure and fun.
Here are a few beginner-friendly ideas:
Burn your name or initials
Trace a simple leaf or flower
Try practice strokes: lines, swirls, dots, and shading samples
Don't aim for perfection — aim for play. Your first few burns are about learning how the pen feels on wood.
🧠 Common Pyrography Questions (Beginners Ask These All the Time)
Do I need different nibs to start?
Nope. A universal or writing nib will serve you well for your first few projects. You’ll learn what extras you need as you go.
What’s the best wood for pyrography?
Go for soft woods like Lime, sycamore, basswood or tulip/poplar. Stay away from pine (too sappy) or treated woods (toxic when burned).
Is it safe?
Yes, when done responsibly. Always unplug your tool when not in use, never leave it unattended, and work in a ventilated space.
💡 Tips for a Smoother Start
Here are a few golden nuggets to make your early pyrography experience feel more peaceful and less panicky:
Go slow – Smooth lines come from patience.
Let the pen do the work – You don’t need to press hard. (Feather soft touch)
Practice on scraps – Warm up before starting your main piece.
Trace with graphite paper – You don’t need to freehand everything!
🌱 Embrace the Beginner Stage
You will make wobbly lines. You might burn too dark or too light. That’s part of the process — not a failure.
Every artist has their “ugly duckling” phase (in fact, every piece has one too). Keep going. Pyrography rewards patience and persistence.
🚪Want More Support on Your Pyrography Journey?
If you’re ready to go from confused to confident, my Phoenix Membership was made for beginners like you. Inside, you’ll find step-by-step videos, realistic projects, and a warm, supportive community to guide you — so you’re never stuck wondering what to do next.
🎉 Click here to join the waitlist or find out more about how the Phoenix Membership can help you grow from unsure beginner to proud pyrography artist.
📌 Final Thoughts
You don’t need to have it all figured out to begin. Just start. Burn a name. Trace a leaf. Smell the wood. Make the mark.
This is how art begins — one line, one spark at a time.
Categories: : beginners pyrography, best wood for pyrography, How to get started in Pyrography, woodburning tools