How to Draw Realistic Eyes (Pyrography, Coloured Pencil and Graphite)
 Kez Halliday
Learn how to draw realistic eyes across pyrography, coloured pencil and graphite. A gentle, honest guide from Kez at Phoenix Academy,
How to Draw Realistic Eyes (Pyrography, Coloured Pencil and Graphite)
Let's break this down, because eyes have a reputation, and honestly, it's a bit unfair.
They get called the hardest part of any realistic portrait. The part that makes or breaks the whole piece. And because of that reputation, a lot of artists avoid them entirely. Trust me, I know. I was one of them.
The eyes I avoided for years
For the longest time, I picked my portrait subjects really carefully, and it wasn't for artistic reasons either. I chose angles and poses that let me dodge eyes altogether. I would pick a lowered gaze, or my favourite was adding steampunk goggles, anything that meant I didn't have to sit down and actually tackle one properly.
Then one day, I just had to push through that barrier. And here's the thing, it turned out to be so much easier than I'd built it up to be in my head. The fear had been doing all the heavy lifting, not the actual technique.
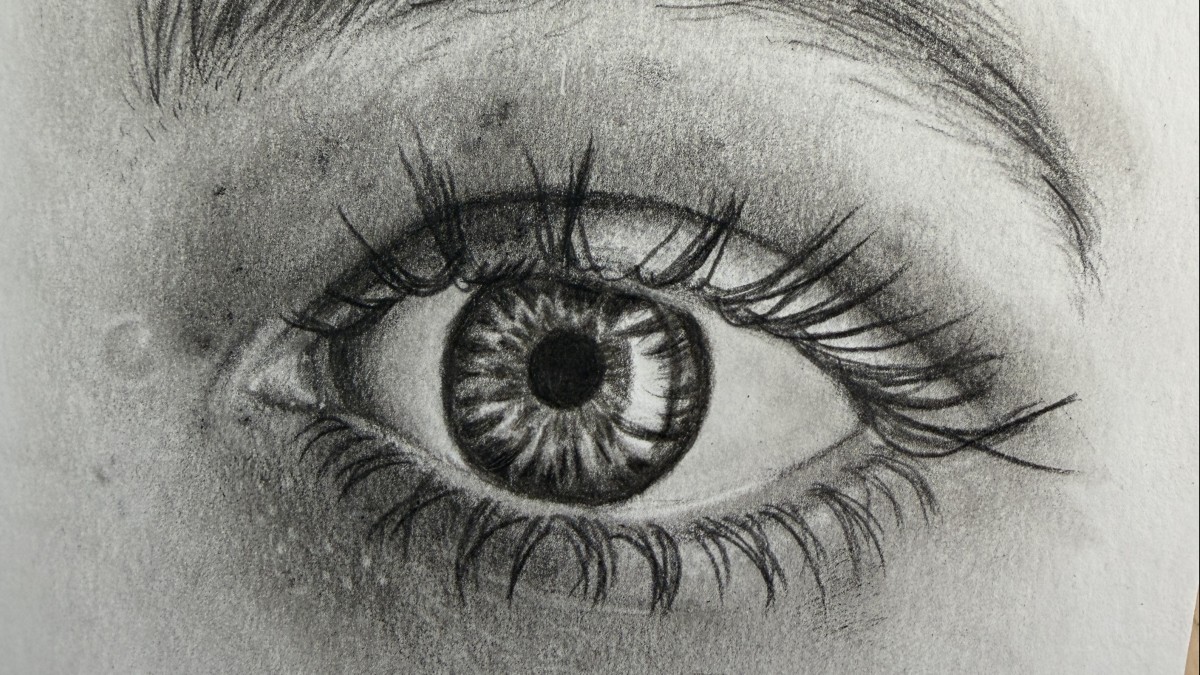
The piece here in this post is a graphite eye study I did recently. Nice and gently, layer by layer, there's no magic trick. Just patience.
What actually makes an eye look real
Before we get into the differences between mediums, here's the bit that stays exactly the same whatever you're holding:
- The white of the eye is never actually white. It's shadowed at the edges, warmer near the tear duct, and often has a soft grey, blue cast or sometimes pinkish. So if you treat it as flat white, then whole eye goes completely flat.
- The iris has structure, not just colour. Fine lines radiating out from the pupil, darker near the outer edge, lighter catching the light closer to the pupil. Skip this and you'll get a flat coloured circle instead of something that looks wet and alive.
- The catchlight is doing more work than you think. That little bright spot of reflected light is what tells your brain "this is a real, moist eyeball," not a painted-on shape. Get its size and placement wrong and nothing else you do will fully rescue it. And they often have a reflection of the eyelashes in them.
- Lashes grow in clusters, not evenly spaced rows. Real lashes clump, cross over each other, and vary in length. Perfectly even spacing is the fastest way to make lashes look fake.
How each medium handles it
Pyrography. You're working in tonal contrast through heat, so the whole eye lives or dies on your temperature control. Too hot too early and you lose the ability to build up those soft mid-tones in the white of the eye. I always establish my darkest darks (pupil, lash line, iris shadow) last, once I know exactly how much contrast the rest of the piece can hold.
Coloured pencil. This is where you can be most patient, because you can always add another layer. Build the iris in thin rings of colour, working from the outer edge inward, and leave your catchlight completely untouched by colour until the very end. It's tempting to add it early. Don't. It's much easier to preserve white paper than it is to try to lift colour back off the paper.
Graphite. No colour to hide behind, so it comes down entirely to values. This is honestly the best medium to practise eyes in first, because it strips the problem down to its purest form: light, shadow, and how dark you're willing to go. The eye study here started with a light structural sketch, then built up in stages, so I could keep adjusting contrast right until the end.
Where to start if eyes still scare you
- Practise on a single eye before attempting a full portrait, no pressure to get the rest of a face right at the same time
- Work from a clear, well-lit reference photo, not a dim or blurry one, this alone solves half the struggle
- Build your darks gradually across the whole eye rather than finishing one area completely before moving to the next
- Remember that a slightly imperfect eye in a warm, characterful portrait will always beat a technically flawless eye with no life in it
If I'd known any of this before I started dodging portraits with eyes in them, I'd have saved myself a good few years of unnecessary detours. Wherever you're starting from, whatever tool is in your hand, the eyes are worth pushing through for.